Framing a roof is one of those tasks that sounds complicated at first, but once you understand the parts and the order of work, it becomes very manageable. Whether you are building a backyard shed, a garage, or a small workshop, knowing how to frame a shed roof correctly will save your time, money, and headaches down the road.
The secret to roof framing is that it is really about measuring carefully and cutting accurately. You do not have to be a carpenter to do this. What you need is a tape measure, a speed square and the confidence to do each step one at a time.
This guide walks you through everything from reading a roof framing diagram to nailing the last rafter in place.
What Is a Roof Framing Plan and Why Does It Matter?
A roof framing plan is essentially a bird’s-eye view blueprint of your roof structure. It is a technical drawing that shows how all the parts of the roof, the rafters, ridge board, collar ties, ceiling joists and supports are arranged, spaced, and connected before a single piece of lumber goes up.
A good roof framing plan shows rafter count, placement, cut angles, and wall connections keeping your build accurate and helping you calculate exactly how much lumber to buy before visiting the hardware store.
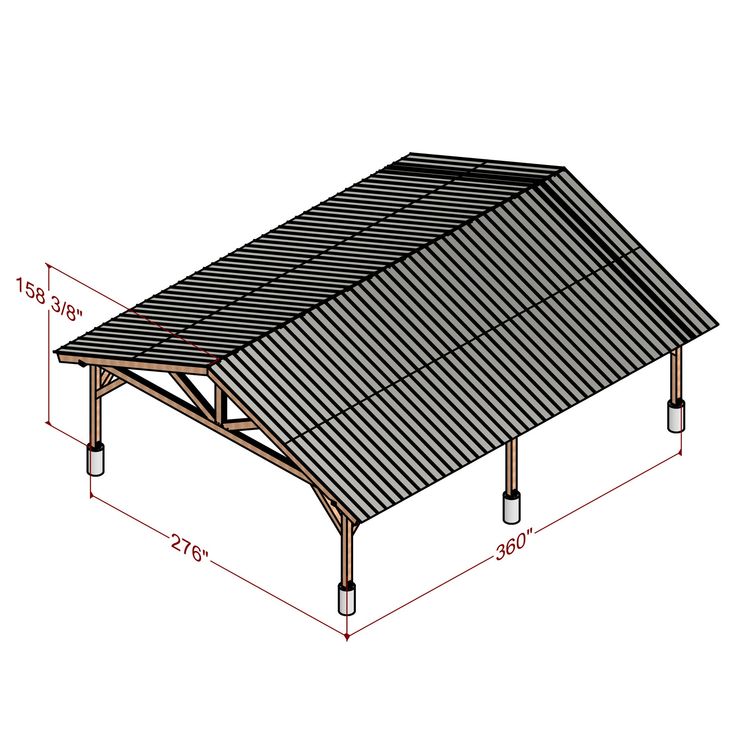
Roof Framing Diagram
A roof framing diagram is a visual representation of the skeleton of your roof. Even without professional experience, learning to read one will make your build far easier.
Here are the key elements you will see on a typical roof framing diagram:
Ridge Board
This is the horizontal member running along the very top center of the roof. All the rafters on both sides connect to it.
Common Rafters
These run from the top wall plate up to the ridge board. They are the most frequently used member in any simple roof.
Collar Ties
Horizontal boards connecting opposing rafters partway up. They prevent the roof from spreading outward under its own weight or under snow load.
Bird’s Mouth Cut
A notch cut into each rafter where it sits on the top plate of the wall. This is what keeps the rafter from sliding off the wall.
Overhang (Eave)
The part of the rafter that extends beyond the wall. It protects your walls and foundation from rain.
Ceiling Joists
If your shed has a ceiling, these horizontal members tie the two wall plates together and stop the walls from spreading. These parts on a roof diagram framing makes the actual build feel much less overwhelming.
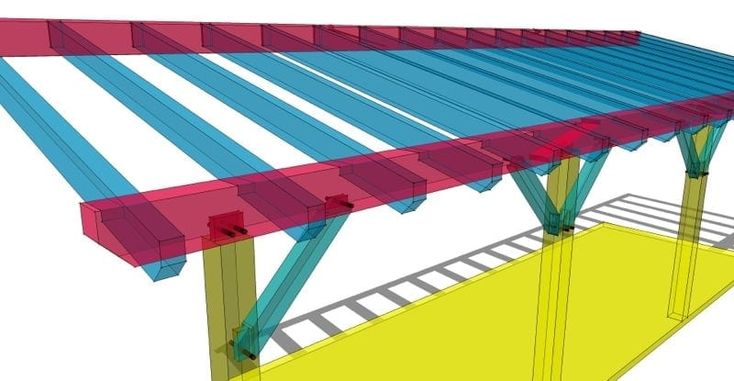
Gable Roof Framing: The Best Choice for a Shed
Gable roof framing is the most popular choice for sheds straightforward, structurally reliable, sheds water well, and buildable by one or two people without heavy equipment. A gable roof has two sloping sides that meet at a central ridge. The triangular end walls called gable ends are what give this roof type its name.
There are two main ways to do gable roof framing:
Method 1
Ridge Beam with Rafters Lapped Over It: A large structural beam runs the full length of the building at the peak, with rafters from each side resting directly on top, alternating side to side. Simple enough for a single builder, and no rafter ties needed.
Method 2
Common Rafters with a Ridge Board: Individual rafters are cut and fastened to a thinner ridge board (not a structural beam). This is the most common residential method. The ridge board simply holds the rafters in alignment; the structural strength comes from the rafters, the bird’s mouth cuts, and the ceiling joists working together.
How to Frame a Roof: The Step‑by‑Step Process
Let us walk through how to frame a roof from start to finish. This process applies to a standard gable shed roof.
Step 1: Determine Your Roof Pitch
Roof pitch is expressed as a ratio rise over run. For example, a 4/12 pitch means the roof rises 4 inches for every 12 inches of horizontal distance. For a shed, pitches between 3/12 and 6/12 are common. Steeper pitches shed snow better but use more lumber. Write your pitch down. Every rafter cut depends on it.
Step 2: Calculate Rafter Length
Using your pitch and the width of your shed, calculate the length of each common rafter. The formula is:
Rafter Length = (Half the shed width) × the rafter length per foot of run for your pitch
Rafter length tables are available at any lumber yard and make this calculation easy. Add extra length for the overhang.
Step 3: Make a Rafter Template
Before cutting all your rafters, cut one and test it. This test rafter is your template. Check that the ridge cut at the top is correct, the bird’s mouth sits flush on the wall plate, and the tail cut at the eave is at the right angle. If everything fits, use this rafter as your pattern to mark and cut all the others. This step saves an enormous amount of time and prevents wasted lumber.
Step 4: Set Up Your Work Area
Lay a walking board down the center of the structure before you go up. This gives you a safe surface to walk on and something to rest the ridge board on temporarily while you set it in position. Safety during roof framing is not optional, always use proper footing.
Step 5: Install the First Rafters and Raise the Ridge Board
Place two rafters at each end of the building four rafters total in the positions they will eventually live. Lay the ridge board across these four rafters. Now carefully lift the ridge board, fasten it to the first rafter, then work your way toward the other end, securing rafter by rafter. Once those four rafters hold the ridge securely, the hard part is done.
Step 6: Install the Remaining Common Rafters
With the ridge board in place, start nailing the rest of the rafters. Work from both ends and move towards the middle. Usually rafters are 16 or 24 inches apart measured from the center of each one. As you go, check each rafter to make sure it’s straight.
Fasten each rafter at the ridge with rafter ties or nails driven at an angle (toe-nailed). At the bottom, the bird’s mouth sits on the wall plate and is toe-nailed through the rafter into the plate.
Step 7: Add Collar Ties
To make the roof stronger, put collar ties across every third pair of rafters in the upper part of the roof. Collar ties are simple boards that go across from one rafter to the other. They help keep the roof triangle strong by connecting the rafters. If you do not have collar ties heavy loads can push the rafters outward.
Step 8: Frame the Gable Ends
The triangular ends need to be filled with frames also known as gable studs. These frames go between the wall plate and the bottom edge of the end rafters. The gable studs help support the sheathing and siding.
Step 9: Install Roof Sheathing
Once all framing is complete, cover the rafters with plywood or OSB sheathing. Start at the bottom, which is called the eave and work your way up. Stagger the joints where the panels meet so they do not all land on the rafter.
Tips for Framing a Shed Roof Like a Pro
Framing a shed roof goes more smoothly when you keep a few key tips in mind.
Use a rafter square
A speed square or framing square makes angle cuts fast and repeatable. Learn the basic markings before you start cutting.
Check your walls first
Before framing a shed roof, confirm that your walls are level, square, and the same height on both sides. An uneven wall plate will cause rafter fit problems all the way up.
Cut a full set of rafters on the ground
Use your template and cut every rafter before climbing up. This way, you are not constantly going up and down the ladder.
Pre-drill at the ridge
Toe-nailing at the ridge is fiddly. Pre-drilling a pilot hole makes it easier and reduces the chance of splitting the lumber.
Do not skip the bird’s mouth
Some beginners try to skip the bird’s mouth notch to save time. Do not. Without it, the rafters are unstable and can twist or slip off the wall plate over time.
Consider hurricane ties
Metal hurricane ties or rafter ties add significant strength where rafters meet the wall plate. In high-wind areas, they are often required by code and they are cheap insurance everywhere else.
Common Mistakes When Framing a Shed Roof
Even experienced builders make mistakes. Knowing the most common ones helps you avoid them.
Incorrect pitch calculation
Getting the math wrong on your roof pitch means your rafters will not meet the ridge cleanly. Double-check everything before cutting.
Uneven rafter spacing
Inconsistent spacing makes sheathing installation difficult. Snap chalk lines on the top plate to mark every rafter location before installation.
Skipping collar ties
This is a shortcut that causes long-term structural problems. Always install them.
Ridge board too thin
For spans over about 10 feet, use a thicker ridge board. A thin ridge under heavy snow load can bow upward and push the rafters apart.
Not accounting for sheathing thickness
If you plan the roof height to the top of the rafter, your finished roof will be a bit higher once sheathing is added. Account for this in your plans.
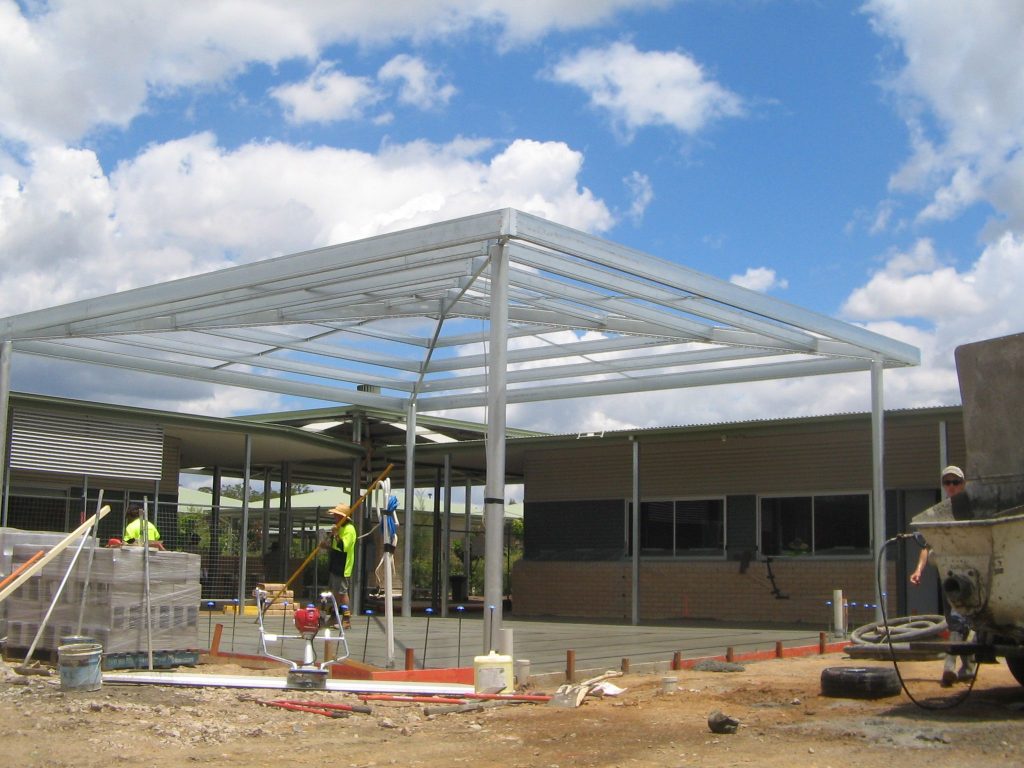
When to Use a Professional Roof Framing Plan
To build a simple backyard shed you can just draw a picture or use some basic computer program to make a plan. If your shed is going to be big or if you want to add a room on top or if the city says you need a special permit then you need to get a really good plan for the roof. You need a plan that’s good enough for engineers to make sure the roof is safe and strong.
Professional CAD-based roof framing plans show every structural member, connection detail, and load calculation in precise scale, including a roof framing diagram for inspectors and contractors.
Steel Construction Detailing provides services for residential, commercial, and industrial projects engineered for safety and code compliance.
If your shed is attached to your home or is larger than about 200 square feet, checking your local permit requirements before starting construction is always a smart move.
Final Thoughts
Learning how to frame a roof is something that helps you a lot when you start building. If you have a plan for the roof, a template for the rafters and you take your time when you put the ridge in place you can make a really good roof.
Take your time on the calculations, cut a test rafter before committing to the full set, and always frame with safety in mind. A well-framed roof is not just about keeping the rain out — it is the structural backbone of your entire building. Get the framing right, and everything else falls into place.
FAQs
Q1. What is the best roof pitch for a shed?
Pitches between 3/12 and 6/12 work best for most sheds. Steeper pitches shed snow and rain more effectively but require more lumber and materials.
Q2. Do I need a roof framing plan for a small shed?
Yes. Even for a simple backyard shed, a basic roof framing plan helps you calculate materials, avoid structural mistakes, and keep your build accurate from start to finish.
Q3. What is a bird’s mouth cut and why is it important?
A bird’s mouth is a notch cut into each rafter where it sits on the wall plate. It keeps the rafter stable and prevents it from sliding or twisting off the wall over time.
Q4. How far apart should rafters be spaced?
Rafters are typically spaced either 16 inches or 24 inches on center. Closer spacing adds strength and is better suited for areas with heavy snow loads.
Q5. Do I need collar ties on a shed roof?
Yes. Collar ties connect opposing rafters and prevent them from spreading outward under heavy loads. Skipping them can cause walls to bow and the roof to lose structural integrity.
Q6. When should I hire a professional for roof framing?
If your shed is larger than 200 square feet, attached to your home, or requires a building permit, a professional engineering-grade roof framing plan is strongly recommended.