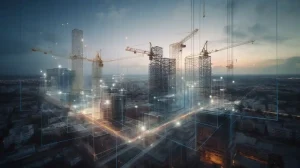
In today’s design and construction industry, architectural visualization has evolved far beyond static images. Clients, developers, and stakeholders increasingly expect immersive, cinematic-quality visuals that communicate design intent, atmosphere, and emotion—not just geometry. Building Information Modeling (BIM) tools like Autodesk Revit form the backbone of architectural design, but turning a technical Revit model into a cinematic 3D render requires a specialized workflow that bridges precision with visual storytelling.
This blog explores the complete journey from a Revit model to a cinematic 3D rendering, covering model preparation, data export, visualization tools, lighting, materials, camera techniques, and final post-production. Whether you are an architect, BIM coordinator, or visualization specialist, understanding this workflow will help you create compelling visuals without compromising accuracy.
Difference Between BIM Models and Cinematic Renders
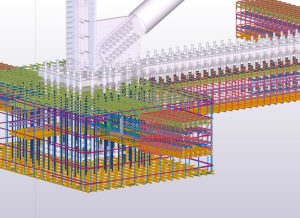
Revit models are designed with coordination, documentation and construction accuracy. They focus on parametric relationships, data integrity and technical compliance. On the other hand, cinematic 3D renders are oriented on mood, realism, narration, and visual effect.
This distinction implies that a Revit modeling will hardly be render-ready, although it can be considered accurate. The rendering performance can be slowed down by factors like over complex geometry, generic material and unoptimized families. An effective workflow would be initiating the fact that BIM and visualization are not used with the same purpose and demand specific preparation procedures.
Preparing the Revit Model for Visualization
The Revit model must also be cleaned before exporting to eliminate all the unnecessary elements like construction details and construction models, the hidden objects, reference geometry and over detailed families. Bolts, annotations, and internal layers that are not needed in visualization add to the size of files and make them slow to render.
Making geometry easier simplifies it and makes navigation in visualization software easier.
Organizing Model Structure and Categories
The layers, categories and naming systems must be logical and consistent. By sorting the elements into materials or functional purpose, it is easier to replace and manage the scenes of an object later.
The models are well structured to lessen the rework and make the visualization process smoother.
Assigning Placeholder Materials
Although Revit material may not always be meant to be given a final rendering, giving it simple place holder materials would allow other Revit models to be consistent when they are imported into a rendering package. High quality textures may be substituted with material IDs later.
Exporting the Revit Model for Rendering
The Revit model is an important step in the process of exporting the BIM to visualization. It is aimed at maintaining geometric precision and reducing redundant information, which may slow rendering. Before export, some non-visual information, like construction details, annotations, internal layers, and unused families, should be deleted. Export formats such as FBX are usually desirable since they do not lose geometry hierarchy and basic material assignments.
The scale, coordinates, and orientation are not lost because the export settings are properly set. Real-world units are meant to be kept in order to have the light and camera behaviour correct in rendering programs. Optimized export removes downstream errors and provides a more seamless visualization workflow.
Importing into 3D Visualization Software
Once exported, the Revit model is brought into visualization software where it becomes the base for cinematic enhancement. Correct import settings preserve scale, hierarchy, and geometry integrity.
- Import using optimized settings to maintain correct scale and orientation
- Verify geometry integrity and fix broken meshes
- Organize objects into logical groups or layers
- Replace heavy or parametric elements with optimized geometry
- Check normals and smoothing for realistic surface rendering
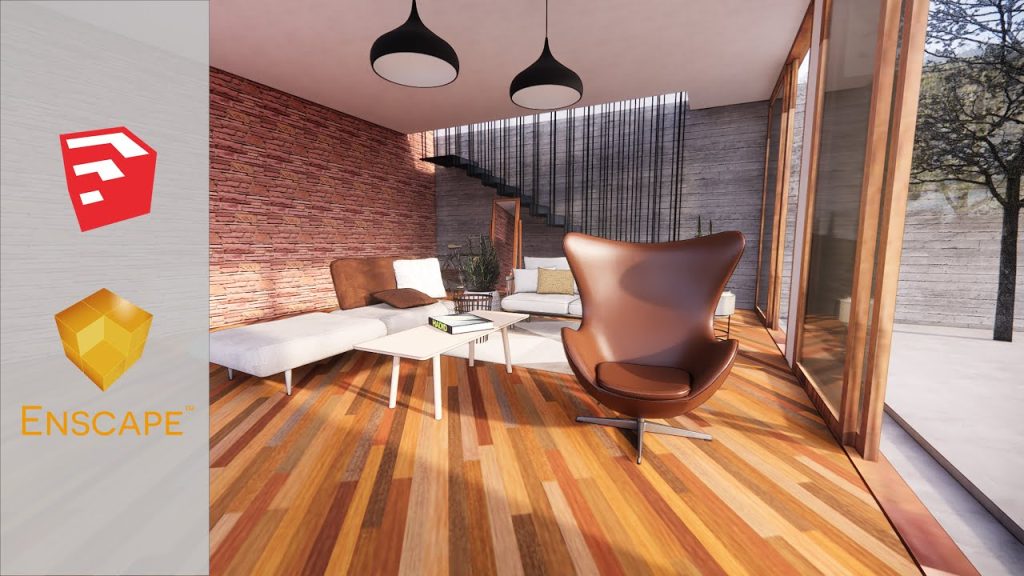
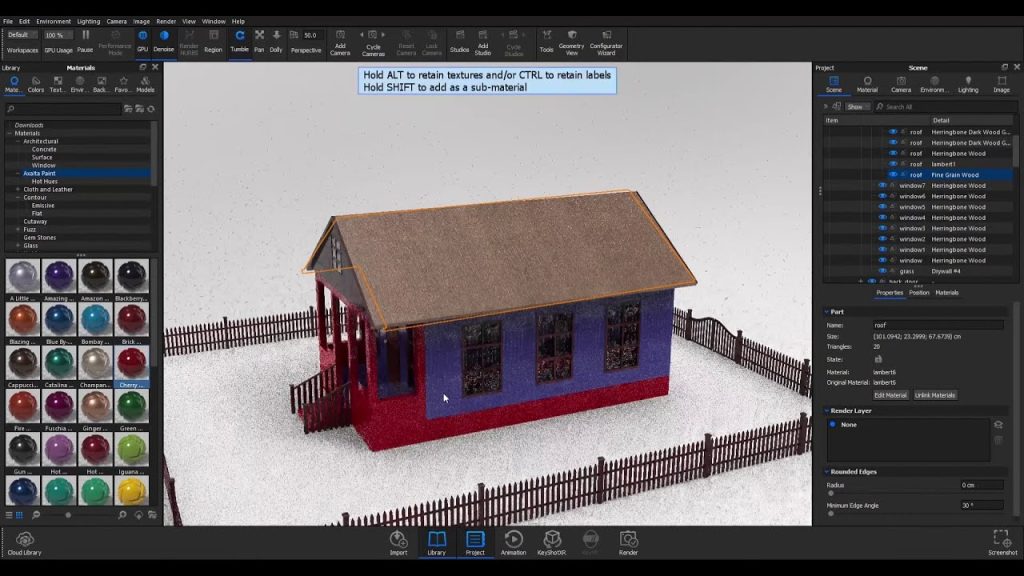
Material Development and Texture Mapping
Material development transforms a technical model into a realistic visual representation. BIM materials are replaced with high-quality PBR (Physically Based Rendering) materials that accurately simulate surface behavior under light.
Use high-quality PBR textures with:
- Albedo (color)
- Roughness
- Normal maps
- Displacement (where needed)
Focus on Material Storytelling
- Subtle imperfections add realism
- Vary roughness values slightly to avoid flat surfaces
- Add edge wear and texture variation
Lighting Design for Cinematic Impact
Lighting is one of the most influential elements in cinematic rendering. Natural daylight systems simulate real-world sun angles, sky conditions, and atmospheric effects, setting the overall mood. Artificial lighting adds depth and functionality, especially for interior scenes.
Cinematic lighting uses contrast, shadow, and highlights to guide the viewer’s attention. Balanced light intensities and accurate color temperatures ensure realism while emphasizing architectural features. Thoughtful lighting design elevates renders from technical visuals to emotionally engaging imagery.
Camera Composition and Cinematic Framing
The composition of the camera identifies the way in which the story of the architecture is narrated. The conceptual components of cinematic framing borrow concepts of filmmaking, including rule of thirds, leading lines, and controlled depth of field. The camera height, lens selection, and the point of view ought to be based on the human experience and the space purpose.
Wide shots create the context, whereas the close-ups emphasize the materials and the design elements. The camera motion and considerate framing has provided a sense of immersion and conveys design intent in a clear and efficient way.
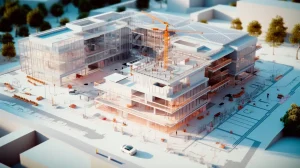
Environmental Context and Scene Setup
Architectural models are based on the environmental context to put them into reality. Outside shots are advantaged by landscapes, plants and roads, and other buildings, which supply the sense of scale and realism. Interior scenes are supplemented by furniture, decor, and some human elements which are subtle but bring spaces to life.
The apparent light of the atmosphere (mogs, reflections, volumetric light, etc) contributes cinematic depth. An environment well designed makes the building to feel real, functional, and aesthetically attractive.
Rendering Engines and Output Settings
The choice of a proper rendering engine is determined by the objectives of the project and output. Such engines as V-Ray, Corona, Arnold, and Cycles are good at photorealism in stills, whereas Unreal Engine and Lumion can be used in real-time cinematic effects.
The rendering engines should be optimized for quality and efficiency.
Quality Controls
- Global illumination accuracy
- Reflection depth settings
- Noise thresholds
Performance Optimization
- Use proxies for heavy assets
- Limit light bounces where possible
- Balance render time vs output resolution
Post-Production and Visual Enhancement
Post-production refines raw renders into polished, cinematic visuals. Tools such as Photoshop, After Effects, or DaVinci Resolve are used for color correction, contrast enhancement, and atmospheric adjustments. Color grading establishes mood and visual consistency.
Additional effects like depth of field, bloom, and motion blur enhance realism without overpowering the architecture. Post-production is where technical accuracy meets artistic expression.
Quality Control and Client Review
Before final delivery, renders undergo rigorous quality checks for visual consistency, realism, and design accuracy. Ensuring materials, lighting, and geometry align with approved designs prevents miscommunication and rework.
- Verify design accuracy against approved drawings
- Check material consistency and lighting realism
- Review camera angles and composition
- Incorporate client feedback efficiently
- Prepare multiple revisions if required
Structured review cycles with clear feedback channels allow revisions to be managed efficiently. Version control ensures changes are tracked and implemented correctly, maintaining project clarity and client confidence.
Conclusion
Transforming a Revit model into a cinematic 3D render is both a technical and creative process. With a well-organized working process of cleaning and optimizing BIM models, creating realistic materials, creating cinematic lighting effects, and fine-tuning the visuals with the help of post-production, design teams can deliver impressive, true-to-life, and emotive renders.
With the ever-changing architectural visualization, the Revit-to-cinematic-render workflow is an influential asset to master and provide the highest impact of a successful designer and a high-quality visual representation to clients and other interested parties.